How to make impressive Champagne Tower: Step-by-Step Guide [read the full champagne story]
Estimated reading time: 11 minutes

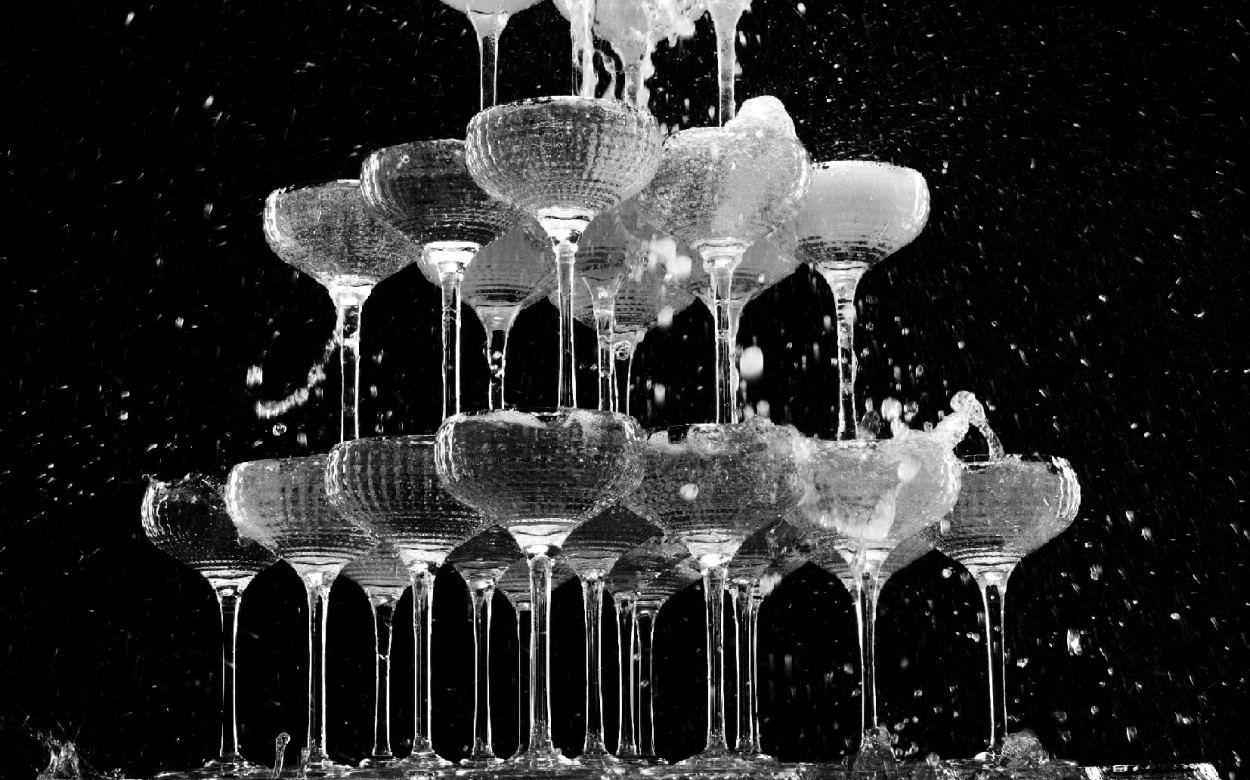
A champagne tower can be an impressive and sparkling centerpiece for your next celebration, embodying both the effervescence of success and the cheer of a party atmosphere. The creation of a champagne tower starts with careful preparation and a steady hand, as you will be stacking glasses in a pyramid form to create a cascading effect when the bubbly is poured. The visual appeal of a well-constructed tower can greatly enhance the festive mood of your event, making it a memorable feature for you and your guests.
When building a champagne tower, the right materials and technique are paramount. You’ll need quality champagne glasses—typically coupes rather than flutes—because of their wider, shallow shape which is ideal for stacking. The base layer is critical, as it sets the foundation for the entire structure. Precision is key, as each glass must touch the others in a circular pattern to ensure stability and a seamless flow of champagne from the top to base during the pour.
The pouring itself is a skillful art; slow and steady, starting from the topmost glass and watching as the champagne cascades down the layers in a smooth waterfall, filling each glass below evenly. Your careful construction and attention to detail will result in an elegant display of sparkling champagne, adding a touch of luxury and festivity to your party’s atmosphere.
Planning Your Champagne Tower
When building your champagne tower, it’s crucial to properly plan accordingly to ensure the structure’s stability and the enjoyment of your guests. Here are some key steps to consider:
Choosing the Right Glassware:
Opt for coupe glasses as they have a wide, shallow bowl ideal for stacking. Avoid using flute or white wine glasses, as they are not suitable for a stable tower.
| Type of Glassware | Ideal Use |
|---|---|
| Coupe Glasses | Stacking |
| Flute Glasses | Toasting |
| White Wine Glasses | Sipping |
Calculating Champagne Quantity:
Estimate about an ounce of champagne per glass to fill the tower. Typically, a bottle of champagne will fill approximately six to eight coupe glasses. Ensure you have extra bottles on hand; Prosecco, Cava, or even sparkling cider can be budget-friendly alternatives.
Finding the Right Table:
Select a sturdy base for your champagne tower. The table should be level with enough room to accommodate the entire structure plus additional space for your guests to approach without crowding.
Preparing the Surface:
Cover the table with a tablecloth that complements the event’s theme. The cloth also catches drips and makes cleanup easier.
Construction Tips:
- Start with a sturdy square or rectangle layer as the base.
- Arrange glasses in a square pattern for each layer, reducing the number of glasses by one as you build up.
- Ensure each glass slightly touches the surrounding glasses.
- Pour champagne into the top glass and let it cascade down to fill the underlying glasses.
Choosing the Right Glassware
To build a champagne tower, select the appropriate glass type that ensures stability and showcases the champagne effectively.
Coupe vs Flute Glasses
Coupe Glasses:
- Shape: Wide, shallow bowl
- Functionality: Ideal for building champagne towers due to their broad, flat base which provides stability.
Flute Glasses:
- Shape: Tall, narrow bowl
- Drink Experience: Preserves carbonation and aroma, but less suitable for towers.
Note: Your choice between coupe and flute glasses affects the tower’s architecture and the beverage’s presentation.
Glassware Alternatives
Plastic Glasses:
- Advantage: Unbreakable, and often shatterproof, which can be a safe alternative for outdoor events or large parties.
- Consideration: Ensure they are of high quality to avoid collapsing under the weight of the tower.
Wine Glasses:
- Usage: Not recommended for towers as their design is not conducive to stacking.
Choose coupes for tradition and stability; pick flutes for a different visual effect and preservation of the drink’s qualities; opt for plastic if safety and durability are primary concerns.
Structuring the Base
The foundation of a champagne tower is crucial for its stability and aesthetic appeal. Focus on creating a solid base and proper glass arrangement to ensure your tower is both impressive and secure.
Calculating Dimensions
To begin constructing your base, start by determining the number of glasses you will need. Use a square formation as this provides optimal stability. Decide the size of your base layer, bearing in mind that a larger base means a taller tower. For a standard champagne tower, a base layer typically consists of a diamond shape with sides containing 5 to 10 glasses. Use the formula n(n+1)/2, where n is the number of glasses on each side of your base, to calculate the total number of glasses for the layer.
Creating a Sturdy Foundation
Before placing any glasses, ensure that you have a sturdy base. This means selecting a flat, level surface and covering it with a tablecloth to reduce slippage of glasses. Consider the material of your table and whether you need additional support—like a wooden board—to distribute the weight evenly.
Arranging the First Layer
Place your champagne glasses, preferably coupe glasses, on the cloth in a square formation. Make sure each glass is touching the adjacent glasses at the rim, creating a diamond shape when viewed from above. The base should be perfectly symmetric and each glass stable. Check each glass by gently nudging to ensure there is no movement. The way you arrange this first layer sets the tone for the entire tower, so take the time to make it right.
Building the Tower
To build a champagne tower, you require precision and a steady hand. The process involves layer by layer construction, with a careful eye on stability to prevent the structure from toppling.
Layer by Layer Construction
Start with a solid, level foundation. Place a large, sturdy tablecloth on a table to create a non-slip surface. Begin the first layer by arranging champagne glasses in a square pattern. Ensure each glass is touching the others at its sides.
For the second layer, place a glass at the center of each four-glass square. This creates a diamond pattern when looking down from above. Each layer will have one less glass per side as you ascend, following this pattern:
| Layer | Glasses per Side |
|---|---|
| 1 | 8 |
| 2 | 7 |
| 3 | 6 |
| … | … |
| n | 1 |
Be sure every glass rests evenly on the glasses below. Continue adding layers, centering each new glass on the four below it until you reach the top with a single glass.
Ensuring Stability Throughout
As you build, check for stability at every layer:
- Press gently on the glasses to ensure they don’t wobble.
- Keep the weight evenly distributed by aligning the rim of each top glass precisely with the center of the glasses below.
- Avoid leaning over the tower as your body movement can introduce shakes.
It’s critical to pace yourself and not rush the process. Quick movements can cause vibrations that may disrupt the tower’s integrity. Remember to fill glasses with champagne only after the entire structure is complete to avoid adding unnecessary weight during the build.
Pouring Techniques
When constructing a champagne tower, the techniques you use in pouring are crucial for ensuring both the visual spectacle and the efficiency of your setup.
Filling the Glasses
Begin by confirming that each glass is identical in volume and shape to ensure an even flow. Here’s the standard pour technique:
- Choose your champagne: Select bottles of bubbly that are well-chilled, as this helps reduce foam and spillage.
- Start at the top: Position your tray at the summit of the tower and carefully begin to pour the champagne into the topmost glass.
- Pour gradually: Aim to pour slowly to minimize overflow; each glass should receive no more than 4 ounces of champagne to allow for equal distribution.
- Use a steady hand: Your pour should be consistent and controlled for a smooth cascade down the tower.
Minimizing Spillage
Controlling the flow to prevent waste is important. Implement these techniques:
- Spillage Tray: Place a spillage tray at the bottom to catch any excess champagne, ensuring a clean surrounding area.
- Slow down: If you notice spillage, gently slow your pour rate to allow the champagne to settle.
- Pause periodically: Allow the bubbles to subside between pours, especially when moving to lower levels of the tower, to prevent overflow.
- Angular pour: Slightly angle the bottle while pouring to reduce the force of champagne hitting the glasses, thus reducing splash.
Decorating the Tower
When your champagne tower is structured, it’s time to elevate its visual appeal. Decoration is key for transforming a simple stack of glasses into a stunning centerpiece that is both an homage to opulence and a prime photo opportunity.
Adding Final Touches
To start, consider integrating berries into your design for a touch of color and refinement. Here’s how you can elegantly do so:
-
Strategically Place Berries: Select ripe, photogenic berries such as raspberries or blackberries.
- Top Glass: Place a small cluster on the rim of the uppermost glass to crown your tower.
- Intermediate Glasses: Tuck individual berries at random intervals to maintain balance without overcrowding.
-
Use Bottles as Decor: Arrange empty or full champagne bottles near the base for added layer of grandeur, perhaps choosing a bottle design that channels the spirit of Marie Antoinette for historical charm.
Lighting and Ornamentation
Enhancing the tower with lighting not only highlights your work but also sets the mood. Here’s a straightforward approach to achieve the right ambiance:
- Twinkling Strings: Weave small, warm, white LED string lights throughout the tower for an enchanting effect that accentuates the champagne glasses’ clarity and the liquid’s golden hues.
- Spotlighting: Position a soft, diffused spotlight above the tower to showcase it as the room’s focal point. Ensure the light is not too harsh to avoid overpowering the subtle reflections and colors of the glassware.
Remember, in both berry placement and lighting, the aim is to complement the tower’s elegance without detracting from the champagne itself, which is the true star of the show.
Hosting and Toasting
When hosting a champagne tower celebration, guide your guests skillfully and master the toast to elevate the experience.
Guiding Guests Through the Pour
To create a magnificent champagne tower, ensure there’s an orderly process. Begin by arranging the glasses in a square base layer and carefully stacking them to form a pyramid. Then, instruct your guests to pour the champagne slowly over the top glass, letting it cascade down to fill the lower tiers. For a seamless pour:
- Start with the top: Direct your guests to pour champagne into the topmost glass until it overflows.
- Even distribution: Encourage them to aim for the glass centers to reduce spillage.
Using prominent champagne brands can enhance the appeal of your tower. Provide a brief demonstration before the actual pour, and consider assistance from party supply companies for glassware and bulk champagne purchases.
Celebratory Toast Tips
A toast is the pinnacle of your event. Here’s how to make a toast memorable:
- Prepare in advance: Know what you’ll say. It should be concise and from the heart.
- Clarity is key: Speak loudly and clearly so all guests can hear.
- Pause for effect: Give guests a moment to raise their glasses before concluding your toast.
Remember, your toast ushers in the celebration, reinforcing the feeling of togetherness and joy.
Frequently Asked Questions
When building your champagne tower, certain questions arise regarding its construction, such as stability, the best glasses to use, and quantity estimations. Below you’ll find detailed answers to these common queries.
What is the ideal number of tiers for a stable champagne tower?
The ideal number of tiers will largely depend on the stability of your base and the quality of the glasses. Generally, a tower of 3-4 tiers is manageable for most, but with careful planning and support, you can go higher.
What type of glasses are best suited for constructing a champagne tower?
Coupe glasses are traditionally used for champagne towers due to their wide, flat shape which allows them to stack securely. Ensure that they are all the same size and shape for best results.
What are the critical steps to follow when building a champagne tower?
First, prepare a stable surface and a solid base with the largest tier. Carefully stack each tier with smaller circles of glasses. Pour the champagne steadily starting from the top tier, allowing it to cascade down to fill the glasses below. Ensure each glass is touching for proper flow.
How can one calculate the number of glasses required for a specific size of a champagne tower?
To calculate the number of glasses, decide how many tiers you want and use triangular numbers: for instance, 1 glass for the top tier, then 3, 6, 10 for the subsequent tiers, etc. The sum of these numbers will give you the total glasses needed.
Is it necessary to use a specialized stand for a champagne tower at an event?
While not strictly necessary, a specialized stand can provide increased stability and ensure that your tower is level. For larger or more elaborate towers, a specialized stand is advisable.
What are the considerations for selecting a champagne tower kit or rental?
When selecting a kit or rental, consider the number of glasses included, the material and quality of the glasses, and whether a stand is provided. Ensure the kit accommodates your desired tower size and guest count.


